
Web site performance is now considered to be very important for the success of any Web business. Web pages that load quicker saves visitors time, people spend less time on site than on a competitor’s site, and winners of this race are rewarded by search engines. In this detailed article, you will learn about the 15 Best Page Speed Optimization Plugin WordPress in 2025. In this article, we’ll explore the advantages of these tools, how they function, and also offer step by step guidelines on how to use them properly. To that end, this article is designed to be your one-stop ultimate guide when it comes to choosing and using the right plugins and improving the loading speed of your WordPress site.
Why Page Speed Optimization Matters
With that, the page speed optimization is not some esoteric need based on standards and technicalities but a functional necessity in order to improve the user experience and the SEO results. This makes a website enjoyable to use, and people are most likely going to purchase what the company is offering since they came to the homepage. Google boasts that while every one second saved increases conversion rates, a one second lag sharply reduces the conversion rates. Consequently, making your website fast must be on the checklist of any site’s owner.
Here are some key reasons why page speed optimization matters:
- Improved User Experience: A fast one ensures that the users stay engaged, do not leave the website because the page takes so many seconds to load.
- Higher SEO Rankings: Google also ranks your website faster sites higher than others making you more visible to internet users for your type of business.
- Lower Bounce Rates: It increases the traffic‘s engagement with the site, as visitors will not get bored waiting for the content to load and consequently have high bounce rates.
- Better Mobile Performance: Since most users are now using mobile devices to visit websites, the technique reduces the time added during mobile browsing..
Well now it’s time to discover the best plugins that can enable you to get these results.
1. WP Rocket

What is WP Rocket?
Barnone knows WP Rocket since it is one of the most used caching plugins for WordPress that is offered at a premium price. It is also described for having a simplistic design and functionality and containing strong tools that make it simple to speed up web pages designed by new talents as well as professional designers.
Benefits of WP Rocket:
- Solution for extensive caching.
- Optimizing of the project – consolidation of several CSS, JS and HTML files.
- All images and videos with the option of to lazy load.
- Database optimization.
- Integration with CDN for faster delivery across the world.
How WP Rocket Works:
WP Rocket achieves this by generating Static HTML copies of your web pages. These are pages whose contents are fixed and pre-stored; visitors get these pages instead of having to access dynamic pages, which place much pressure on the server by constantly regenerating content: page loading times are considerably minimized. This plugin also minifies CSS & JavaScript files to make your website faster and lessen the loading time.
How to Set Up WP Rocket:
- Install and Activate: You can order WP Rocket from their official website – it is better not to use third-party sites to download the plugin.; Simply install the purchased plugin on your WordPress admin area.
- Enable Caching: Navigate to the WP Rocket settings and turn on caching to build copies of your web page.
- File Optimization: Facilitate the process of CSS, JS and HTML including for the purpose of file size reduction.
- Lazy Loading: It can enhance the first loading time to implement the lazy loading for images and videos.
- CDN Integration: If you use a Content Delivery Network (CDN), WP Rocket integrates it for you and optimizes content delivery.
WP Rocket also comes with extra features such as the cleanup of your database and GZIP compression to help increase your site speed.
2. W3 Total Cache
What is W3 Total Cache?
W3 Total Cache is an outstanding and free plugin that helps WordPress users in matters of caching. Its goal is to enhance the performance of servers, reduce file download time, and enhance the users ‘experience’.
Benefits of W3 Total Cache:
- We have put in place a number of measures, where page caching is used to minimize the server’s workload.
- These are referable to as minification of CSS, JavaScript and HTML files.
- Database caching.
- Object caching.
- Support for CDN integration.
How W3 Total Cache Works:
W3 Total Cache also saves static copies of your site’s pages thus eliminating the need for dynamism in content. Files are also minified including CSS, JavaScript, and HTML in order to make the size of the files smaller and, therefore, the page loading time.
How to Set Up W3 Total Cache:
- Install and Activate: You should download and activate the plugin from WordPress repository.
- General Settings: Go to General Settings under Performance – turn on page caching, minifying, and object caching collectively.
- Page Cache: Cache control should be allowed for caching web pages in order to cache static HTML files.
- Minify Files: Support file minification to decrease the CSS, JavaScript and HTML files.
- CDN Integration: For instance if you have a CDN, you will need to set the CDN settings in the plugin that you are using.
- Save Settings: Then you should restart the program and select your preferred settings and close it to clear all the cache as well.
3. Autoptimize
What is Autoptimize?
Autoptimize is a convenient plugin which specializes in optimizing CSS, JavaScript and HTML files. It also assists in minimizing the dimensions of such files thus enhancing the rate of your website’s loading.
Benefits of Autoptimize:
- Compresses and merge CSS, JavaScript, and HTML files.
- Accommodates use of the load image as you go feature.
- Optimizes Google Fonts.
- Unity in the set of design and style must not neglect textual scaling: it lessens the number of HTTP requests.
How Autoptimize Works:
Autoptimize can also minify and join your website cs, JS, HTML files as a method of ensuring that the file size is minimized. Therefore it caches Google Fonts and also uses lazy loading for much better performance.
How to Set Up Autoptimize:
- Install and Activate: Users can simply install and activate this plugin from the official WordPress repository area.
- General Settings: It has two options to enable optimization of JavaScript, CSS, and HTML files, found under Settings > Autoptimize.
- Extra Options: Allow images to load only when they are about to be viewed along with the optimizations of fonts by Google.
- Save Settings: File your settings and determine whether there has been an enhancement in the performance of your website.
4. WP Super Cache
What is WP Super Cache?
WP Super Cache is a caching plugin that has been created by Automattic – the company behind WordPress dot com. It creates copies of HTML files from your website built in WordPress to enhance the loading times.
Benefits of WP Super Cache:
- Generates static HTML files.
- Reduces server load.
- Supports GZIP compression.
- Easy to configure.
How WP Super Cache Works:
WP Super Cache does this by making copies of the WordPress blog in the form of static Website pages. Etag caching serves static files to the users in order to have it already downloaded by the server and also to increase the speeds of the page.
How to Set Up WP Super Cache:
- Install and Activate: You will find the SearchWP plugin in the WordPress plugins repository where you can download and install it:
- Settings: Select Settings, then WP Super Cache and turn on caching.
- Advanced Settings: Possibility to activate extra settings such as compression and CDN support.
- Save Changes: To do this, click on that button and apply your settings, then clear the cache.
5. LiteSpeed Cache
What is LiteSpeed Cache?
LiteSpeed Cache is an impressive caching plugin that is designed to work best when used with LiteSpeed web servers even though it has non LiteSpeed server optimizations options. It offers an integrated site acceleration platform with server caching and other optimisation facilities.
Benefits of LiteSpeed Cache:
- Server-level caching is used to provide faster loading speed to cater the needs of optional ultra-fast loading speed.
- CSS, JavaScript and HTML files compression.
- Image optimization.
- Lazy loading for images.
- Database optimization.
How LiteSpeed Cache Works:
LiteSpeed Cache works by storing builds of the static pages on the web server to help provide a faster visit for clients. It also applies to the smallest files including CSS and JavaScript files making them even smaller and also applies lazy loading on the web page which enhances the speed of the page.
How to Set Up LiteSpeed Cache:
- Install and Activate: This plugin can be found from the WordPress repository where you can download it.
- General Settings: Go to LiteSpeed Cache > General and turn caching on.
- Image Optimization: Navigate yourself to “Image Optimization” and turn the respective features on – lazy loading and image compression.
- Page Optimization: Support fragment for CSS/JavaScript/HTML file minification and concatenation.
- Save Settings: Saves the settings and increases the page loading speed of the site.
6. Hummingbird

What is Hummingbird?
Hummingbird is one of the speed optimization plugins that is offered by WPMU DEV. For caching, minification and image optimization, it provides a wide range of tools to enhance your web site.
Benefits of Hummingbird:
- Page caching.
- Compression of / Compaction of CSS, JavaScript, and HTML files.
- Image optimization.
- GZIP compression.
- Performance reports.
How Hummingbird Works:
Hummingbird checks your site for concerns regarding speed and includes advice on what to do on the side. opens a cache of pages and optimizes the files to make pages to load faster.
How to Set Up Hummingbird:
- Install and Activate: It can be downloaded and installed through the WordPress repository after which activation is done.
- Performance Test: Perform a performance test in order to discover potential for improvement.
- Enable Caching: Navigate to “Caching” and then turn on the feature of page caching.
- Minify Files: Go to the section called “Assets Optimization” and turn on Minify CSS, JavaScripts, and HTML files.
- Image Optimization: Optimise the images by using the image optimisation that will make the sizes of the images smaller.
7. Cache Enabler

What is Cache Enabler?
Cache enabler is another simple caching plugin that doesn’t bring any bloat along with it. This one creates Static HTML copies of your dynamic WordPress site in order to speed up your site.
Benefits of Cache Enabler:
- Simple and lightweight
- Generates static HTML files
- Supports WebP image format
- Automatic cache clearing
How Cache Enabler Works:
Cache Enabler generates ‘.htaccess’ files of your WordPress website and delivers them to visitors instead of heavy WP files to minimize the load on your server and minimize the page loading time.
How to Set Up Cache Enabler:
- Install and Activate: It can be downloaded and installed from the WordPress repository and once activated this one automatically adds the feeds.
- Settings: Since the browser’s caching option is already on, the next step is to open the cache enabler under “Settings”.
- Enable WebP Support: If you apply WebP images, it’s recommended to activate WebP support to have even faster graphic content loading.
- Save Changes: Click the button and save the changes, and select the okay button to clear the cache.
8. Smush
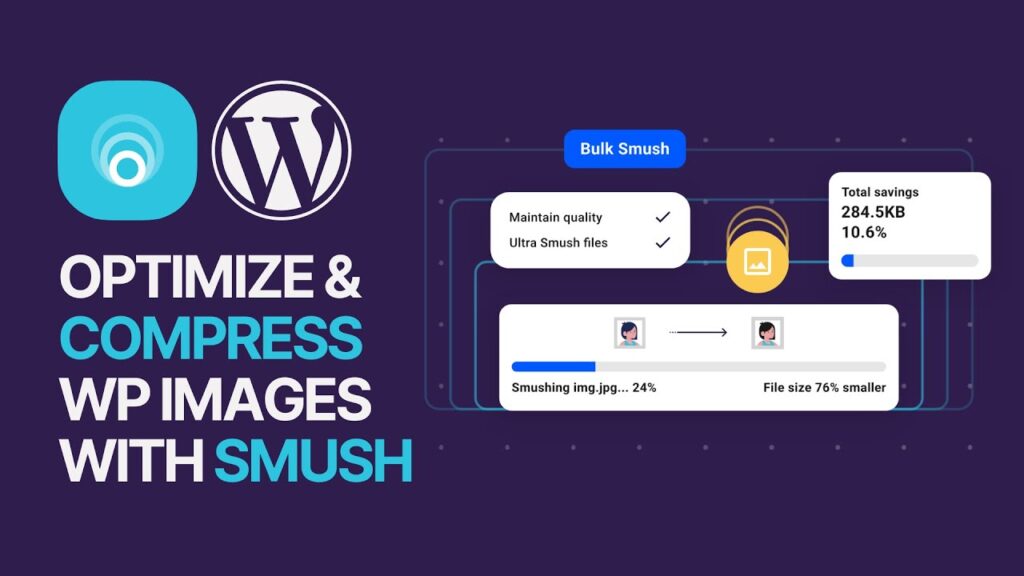
What is Smush?
Smush is an image optimization plugin that can be used to optimize images efficiently online and give an improved, smaller size.
Benefits of Smush:
- Lossless image compression.
- Bulk image optimization.
- Lazy loading.
- It supports many types of images.
How Smush Works:
Smush miniaturised images to decrease the size of the file while the lazy loading enables the management of time taken to load the pages.
How to Set Up Smush:
- Install and Activate: Using wordpress, click on the plugin and then download it before activating it.
- Bulk Optimize: In order to optimize all existing images one has to go to “Smush > Bulk Smush”.
- Enable Lazy Loading: Once you’re on the Twine Canvas, go to the “Lazy Load” tab and turn on lazy loading for images.
- Save Settings: You should always retain your changes then check the traffic and statistics of your site.
9. Perfmatters
What is Perfmatters?
Perfmatters is an easy to use and lightweight WordPress performance plugin that leaps into action and deactivates numerous options and HTTP requests which are not essential to your site. Unlike most plugins where they are limited to only caching solutions, Perfmatters boasts of bringing several exclusive optimization elements to your pages.
Benefits of Perfmatters:
- The core of WP is filled with features that have little sense to the enable, so the disable of all these options in the WordPress is needed.
- Reduces HTTP requests
- Applies lazy loading to images
- This is referred to as DNS prefetching o preloading
- Crash Handler to stop scripts that are not desired or required
How Perfmatters Works:
Perfmatters works as a plugin that gets to disable these features that you or maybe other users never use: emojis, embeds, and the REST API. It also provides control on the script running on your browser and you can even disable it on particular sites in order to have fast loading of those particular sites.
How to Set Up Perfmatters:
- Install and Activate: Visit the Perfmatters website and install the plugin on your WordPress blog or website.
- General Settings: Navigate to the Perfmatters settings and toggle off features such as emojis and or/and embeds.
- Script Manager: To manage scripts on particular page’s use the Script Manager and turn off the use of the scripts that are not required for some pages.
- Lazy Loading: Optimise images for page speed by allowing them to load lazily on the website.
- Save Settings: Click on the save settings page and have ways of checking how your website is performing.
10. WP Fastest Cache
What is WP Fastest Cache?
WP Fastest Cache is the caching plugin of WordPress, which is available for free with some advanced paid options. This one gives you an easy and simple working interface along with great facilities to enhance the caching system on your website.
Benefits of WP Fastest Cache:
- Page caching.
- Compressing of CSS as well as JavaScript files.
- GZIP compression.
- Browser caching.
- CDN support.
How WP Fastest Cache Works:
WP Fastest Cache works by creating copies of the dynamically generated WordPress site and delivering those copies to the users. It also compresses CSS and JavaScript files which makes the size small and therefore helps in increasing the rate of loading of pages.
How to Set Up WP Fastest Cache:
- Install and Activate: It can be downloaded and installed from the wordpress repository and upon installation, activated.
- Settings: If you go to the plugin settings, scroll down till you find the caching tab and then enable caching.
- File Minification: Allow the compression of Cascading Style Sheets and JavaScript sheets.
- GZIP Compression: Choose option to allow HTTP GZIP compression in order to save file size.
- Save Changes: Depending on your browser, continue your settings, and then empty your cache.
11. Asset CleanUp
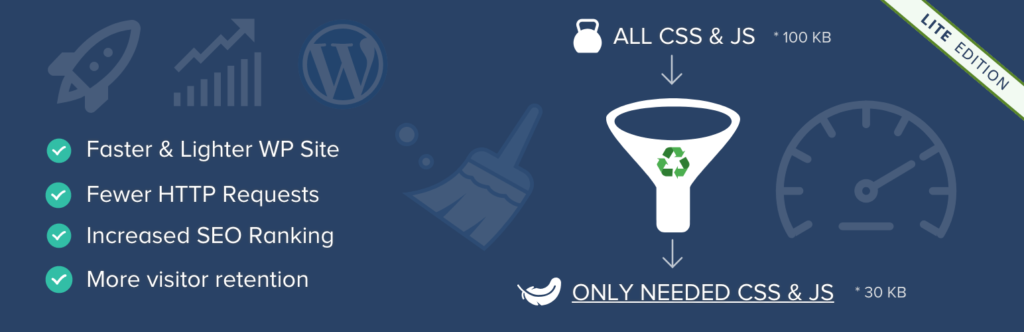
What is Asset CleanUp?
Asset CleanUp is a performance optimization plugin which means that it enables the user to handle the HTTP requests within the WordPress site. It enables you to include only the needed CSS and JavaScript files into each page.
Benefits of Asset CleanUp:
- Reduces HTTP requests.
- Compresses size of CSS and JavaScript files.
- Removes the CSS or JavaScript which is not used in browsers and reduces the size of the page.
- Speeds up page load times.
How Asset CleanUp Works:
Asset CleanUp maintains a list of all CSS and JavaScript files on your website’s pages and tells you which of them are loaded on any given page. It is possible to decide on deactivation of unnecessary files and thus the number of requests will be less and performance will be higher.
How to Set Up Asset CleanUp:
- Install and Activate: You can install and activate this plugin directly from the WordPress repository.
- Page Settings: Click on the “Edit Page” section and alter the assets that are running on all the pages.
- Minify Files: Allow for CSS and JavaScript files to be minified.
- Save Changes: Store and review your preferences and your website’s traffic.
12. NitroPack
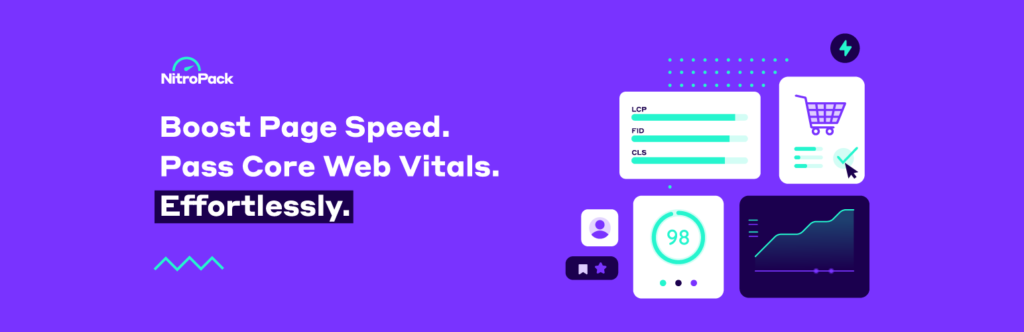
What is NitroPack?
NitroPack is a single solution for caching, image optimization, and file minification since it is a speed optimization tool. It provides the solution in the cloud to optimise your site.
Benefits of NitroPack:
- Efficient speed enhancing.
- Cloud-based caching.
- Image optimization.
- File minification.
- Performance enhancement without the need for external input.
How NitroPack Works:
NitroPack links your WordPress site to their cloud servers where caching and optimization happen. It best applies the correct setting for optimizing your website’s speed without having to press a button.
How to Set Up NitroPack:
- Install and Activate: Start with installing the NitroPack plugin and link it to your NitroPack account.
- Configuration: Go to your NitroPack account and set up optimization settings there.
- Automatic Optimization: NitroPack will do this for you, optimizing your site’s performance every time.
- Monitor Performance: For instance, you can use Google PageSpeed Insights to know how fast your website loads.
13. Lazy Load by WP Rocket

What is Lazy Load by WP Rocket?
Lazy Load by WP Rocket is an easy to use small size plugin that adds lazy loading functionality to your site for images and iframes. It assists to minimize momentary dwell time on the page through the strategy of the Lazy loading of the images which loads an image only when it is visible within the current window.
Benefits of Lazy Load by WP Rocket:
- This one cuts down the large amount of time needed for the page to download the first time the visitor enters your site.
- Enhances the features of a site or application for its usage on handheld portable devices.
- Lightweight and easy to use.
How Lazy Load by WP Rocket Works:
When a web page is first loaded the plugin defers the loading of the images and iframes to the time when these are likely going to be visible on the user’s screen. This helps in minimizing the HTTP requests during the first time round known as page load.
How to Set Up Lazy Load by WP Rocket:
- Install and Activate: To acquire and install the plugin, go to the WordPress repository and activate the plugin from there.
- Settings: There is no more configuration possible since the plugin works in the background.
- Monitor Performance: Utilize performance testing tools to verify optimization mostly concerned with the load time.
14. WP-Optimize

What is WP-Optimize?
WP-Optimize is an all in one plugin that provides caching, database, and image optimization for faster website loading.
Benefits of WP-Optimize:
- Benefits of WP-Optimize:
- Caching
- Database cleanup
- Image compression
- GZIP compression
How WP-Optimize Works:
WP-Optimize clears your database by deleting unnecessary entries, optimizes your images and stores separate copies of your web pages for quicker access.
How to Set Up WP-Optimize:
- Install and Activate: It can be obtained freely from the WordPress repository and installed and activated as any other plugin.
- Database Optimization: Proceed to the “Database” section and remove what is no longer needed.
- Image Compression: There is one more feature that helps to optimize images, use it to decrease sizes of the images.
- Enable Caching: At this section, set the page caching option to ‘enabled’.
15. Breeze

What is Breeze?
Breeze is the performance optimization plugin created by Cloudways. It provides clients with a cache system and access to a file minification tool as well as the integration with a CDN system for enhanced website speed.
Benefits of Breeze:
- Page caching.
- File minification.
- GZIP compression.
- CDN integration.
- Database optimization.
How Breeze Works:
It creates copies of HTML pages of your dynamic WordPress site, and minifies CSS and JavaScript files for the purposes of reducing download times.
How to Set Up Breeze:
- Install and Activate: You can download and activate it from the official repository to the WordPress website.
- General Settings: If your Breeze application is installed: proceed to its settings and turn on caching and file optimization.
- CDN Integration: If you use a CDN, you’ll need to set up your CDN settings in the plugin itself.
- Save Changes: Remember your settings and watch your sites’ performance.
Conclusion
Selecting the right page speed optimization plugin means a lot as it enhances the WordPress website. Every single plugin described in this guide can enhance a website with its special properties and features. That being said, the use of these plugins would assist in lessening loading times, enhancing usability, and increasing overall Search Engine Optimization. It is advisable if you spend your time and effort to ensure that each plugin is tested before deciding on the right plugin for your website.